October 30, 2009 by sharky
Free Satellite TV Checklist… What You’ll Need
1. Satellite Dish (and peripherals) - total cost: under $150 (excluding cable).
2. Satellite Receiver (IKS-compatible) - cost: $150 (and higher).
3. Firmware/BIOS updates for the receiver - cost: free (requires Internet access).

*Because of the distinct possibility in relation to personal liability due to theft of a TV satellite service, many Americans are opting only to receive from Bell. Likewise, Canadians may opt only for signals from Dish Network. Notwithstanding, it’s much safer to steal a signal from a foreign country than it is from within your own. It’s highly unlikely the RCMP are going to march down to Texas to prosecute you; this is not a reality.
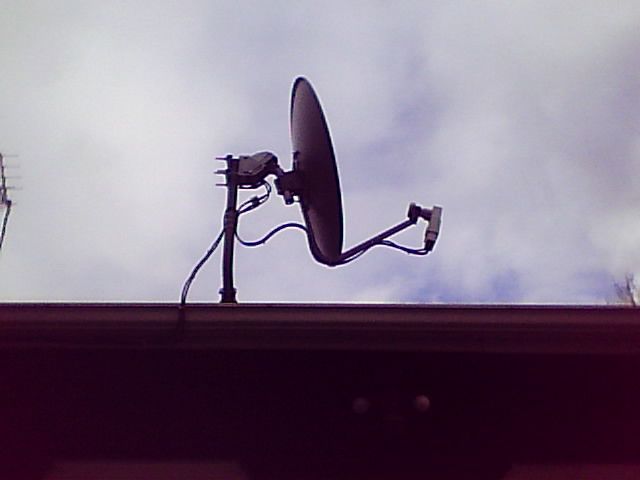
1. Satellite Dish Equipment
Choosing a satellite dish.
When choosing a satellite dish, bigger is almost always better. The larger the dish, the more you’ll be able to receive. A 30" dish is the minimum recommended size; 33" (and up) is optimal. The brand-name of the dish is somewhat irrelevant - even an existing dish from a provider like DirecTV, Dish Network or Bell TV will also work - however, subscriber dishes won’t get what’s known as True FTA (legal free-to-air) and won’t offer both US and Canada - thus it’s not a desirable option. The cost of a new dish is less than the monthly rate charged by any retail satellite TV provider. So opt for a new dish instead of using one that’s already sitting on your rooftop - any universal/generic FTA dish will do just fine, although we recommend a 33" (75cm) offset dish such as Digiwave’s DWD-75C-BK. Price: about $50.
Other peripherals.
In addition to the dish, there are other accessories:
- • An LNB or LNBF (Low Noise Block Feedhorn) will be required for your dish, and most LNBs nowadays come with the feedhorn integrated. From a pirating standpoint, an LNB with both linear and circular support is required, such as the Invacom QPH-031. This LNB is without a doubt the best one in the business; don’t waste your time with anything else. Price: about $50.
- • A motor for the dish (recommended). For those who want the option to receive signals from different "birds" (satellites) either a motor will be required, or else multiple satellite dishes will be needed and linked through a DisEqC switch. Save yourself the trouble now and opt for a motor (it’s a great investment) - such as the Moteck SG2100. Price: under $70.
Purchasing a satellite dish.
Most of this stuff you won’t be able to find at your local big-box electronics chain. eBay is a great source for FTA equipment, as well as online shopping through sites such as worldwidesatellites. For those who don’t know which LNB to choose from to complement their dish (or even which dish to opt for), many retailers & eBay sellers offer packages which include all three hardwares rolled into one sale - which actually turns out to be cheaper than purchasing each part separately, as seen in this example for $115. Most reputable Canadian eBay sellers will ship to the USA, so receiving your equipment shouldn’t be a problem.
Dish Installation.
We won’t delve too deeply into the installation of satellite dish equipment; there are sites everywhere that explain this procedure (eHow is one). But the main point is to make sure that the post in which it is mounted on is secure and perfectly vertical (90° from level ground). Use a carpenter’s level to achieve this. Equally important is where to position the dish (see below).

Dish Positioning (with motor).
The purpose of the motor is twofold: First, it facilitates the process of positioning your dish, without the need to point the dish towards a specific precise location. In short, the motor does the work for you by finding the birds. Second, it allows you to access multiple satellites (birds) nearly simultaneously by automatically adjusting the dish position depending on which channels or inputs you select through an IKS-receiver.
It is, by far, much easier to install & configure a satellite dish that’s attached to a motor. Simply point your motor due south (use a compass) and then mount your dish onto the motor - which by default should also be aimed due south. The rest is accomplished through the IKS unit.
Dish Positioning (without motor).
If you’re not using a motor with your satellite dish, there are mainly two things here to consider: Your global location (in reference to the satellites), and which provider(s) you’re planning on hijacking free satellite TV from. Since we’re only covering IKS-compatible FTA receivers (these are the only ones that currently work), there are only a handful of good options for North Americans - although they are great. This is also exactly why the motor is an extremely useful piece of hardware, since it will change the positioning of your dish depending on which bird, service (or channels) you’re viewing.
Without a motor, your dish will only be able to pick up just one of the services listed below. That is, unless you’re using multiple dishes. In contrast, a motorized dish will be able to pick up all four birds (and many more).
| Service: | Satellite / Bird: | Position: |
| Bell TV (regular) | Galaxy 17 / Nimiq 1,2 | 91.0W |
| Bell TV (HD) | DirecTV 3 / Nimiq 4 | 82.0W |
| Dish Network (1) | DirecTV 5 / Echostar 10,11 | 110.0W |
| Dish Network (2) | DirecTV 7S / Echostar 7 | 119.0W |
Assuming there’s no motor on your dish, you’ll need to find your specific location in reference to the birds. www.dishpointer.com is the best service for this. At DishPointer, enter in your city (or specific address, if necessary) and select from one of the four available options (91.0W, 82.0W, 110.0W or 119.0W) from the satellite dropdown box. Of course, there are other birds but these four are the ones we’re concentrating on. If a green line appears for your location, then you’ll be able to access that bird. Dish Setup Data can be found at the bottom of that page.

DishPointer can also be used to configure where to position a motor or even multi-LNBs.
2. Use an IKS-Compatible Receiver
Why IKS / What is IKS?
IKS (aka Internet Card Sharing or Key Sharing - See Wiki entry) is, in essence, a service that shares working subscription cards through an Internet server to provide free programming to satellite owners. An IKS provider communicates with a ‘man-in-the-middle’ offshore server (China, Russia, Malaysia, S. Korea, etc) to exchange packets with other IKS clients and servers. All that’s required is an IKS-compatible receiver, satellite hardware and Internet access.
Currently, there’s no ‘crack’ to the Nagravision 3 encryption that has put tens of thousands of descramblers out of commission. For now, non-IKS units are blacked out due to an N3 swap - and there’s no telling if/when this will be fixed - if ever. Truth be told; there are only two viable options here: either pay for the satellite TV service legitimately, or opt for an IKS receiver. We’ll discuss the latter.
Choosing an IKS-Compatible FTA Satellite Receiver
There are various makes & models of IKS sat receivers on the market. Some are better than others, and can receive both Bell (BEV) and Dish Networks (DN) as seen at FTABins status page (stats are updated regularly, check back often). Furthermore, some units are capable of receiving HD satellite channels, and also duplicate as PVRs so you can program & record.

Additionally, be sure to check out TVKeyz IKS Status page for updates. Trusted providers include:
- • nFusion - www.nfusion.ca - Phoenix, Nuvenio or HD models are recommended, Solaris model for $200 is the most affordable option.
- • CNX - Conaxsat.ca / Conaxtech.com - Nano 2 series recommended.
- • Others include: Sonicview, KBox, IKS Slinger, Dreambox DM100, Neosat and I-Link - and many more.
Purchasing an IKS Receiver
There are a multitude of online stores that sell IKS receivers, although I happen to be partial to KingFTA (they’re a licensed nFusion reseller). Google Shopping and eBay are also valuable tools - such as this esteemed eBay seller. It should be noted that most units are sold "as-is" and will thus require a firmware/BIOS upgrade in order to start receiving free satellite TV.
Receiver Settings / Choosing birds / positioning
Many - even most - IKS receivers have a user menu in which specific settings can be changed. The example below shows how to add multiple birds and perform channel scans through nFusion.
The video below shows how to set up most functions through the older nFusion Nova receiver. While Nova is no longer a recommended unit, the principles are essentially the same for all.
3. Firmware/BIOS Updates For Your IKS Receiver
Internet Access is a Must
To be able to flash or update the firmware on your IKS receiver, you’ll need to hook it up to use your PC’s Internet connection through an ethernet cable (using a hub or network card) or even WiFi. In order to use IKS you’ll definitely need Internet (an open spot on a router using DHCP works great), but it’s as configurable as any computer. Setting up access is done through the software menu on the IKS receiver (see video above).
Find updates for your IKS Receiver
Many available resources exist for finding firmware updates and supporting files. In our opinion, the most trusted site is tvkeyzforums.com. From their downloads page, simply select the make/model of your IKS receiver and download the appropriate files. Often there will be all-in-one packages which include guides and tutorials pertaining to your particular IKS model - such as these ones for nFusion Solaris:
- • Using nFusion Loader - RS link.
- • nFusion Solaris/Phoenix Setup Guide - RS link.
Resources:
- • http://www.ftabins.net
- • http://tvkeyznews.com / http://www.tvkeyzforums.com
- • http://www.dishpointer.com
Others:
- http://ftalist.com/english.htm - a list of freebie channels/sats.
- http://tvonline.bell.ca/tvonline - Bell’s television listings.
- http://tvlistings.zap2it.com - more TV programming.
- http://tvlistings.aol.com/listings - Dish Network program list.
- http://dishuser.org/dishlist.php - Dish Network Channel list.
- http://en.wikipedia.org/wiki/List_of_Dish_Network_channels
Archived by FSFmirror
![]()
