All the tutorial stuff I’m finding on portforward.com and blue skies.com involve mapping ports using the AirPort Admin Utility, which does not support the newest version that comes with this base station.
This is a pictorial guide to getting clever (connectable) using the new AirPort Utility, assuming you already have the network set up and running (Named, Connected to your ISP, etc.) and are running at least Tiger (OSX 10.4).
Open the AirPort Utility: Applications ->Utilities ->AirPort Utility

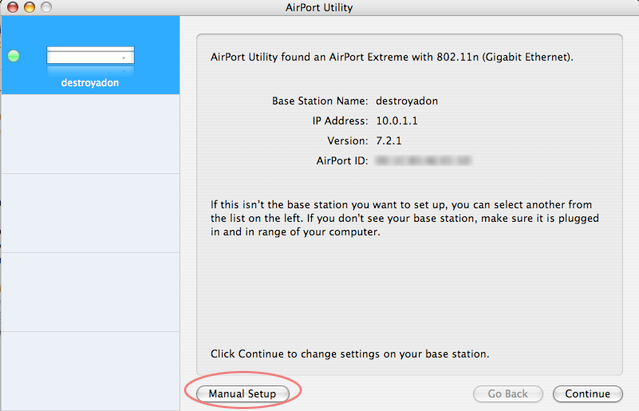
1.) Choose Manual Set Up:
This button is in the lower left:
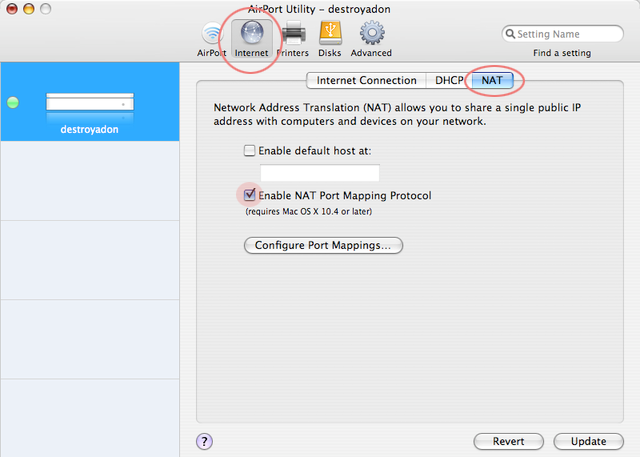
2.) Enable NAT:
Far left tab within the Internet pane:
Put a checkmark in the box: Enable NAT Port Mapping Protocol.
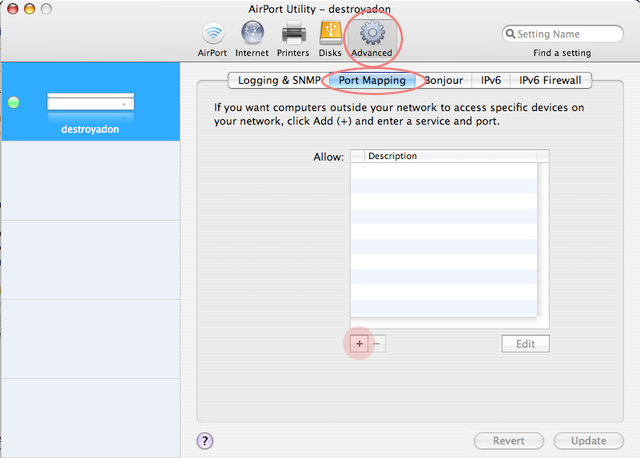
3.) Map Ports:
Second tab within the Advanced pane:
4.) Choose a Service:
Click the ( + ) icon as seen in the screenshot above. This Add button gives a dialog box listing the services allowed for port mapping:
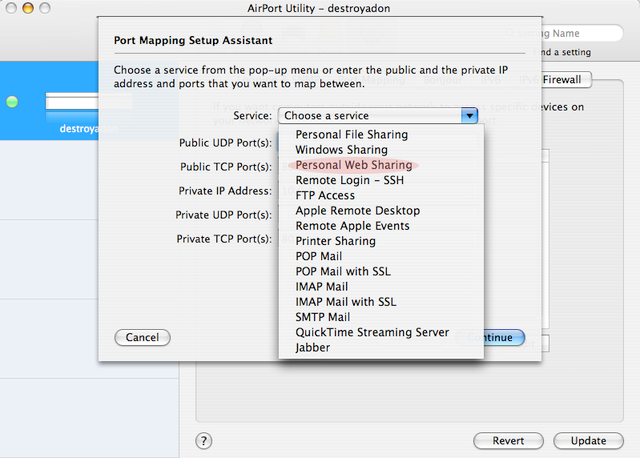
Choosing one of the services fills in an automatic entry into one or many of the port options. Personal Web Sharing (see above) is the service used for torrent clients.
5.) Personal Web Sharing
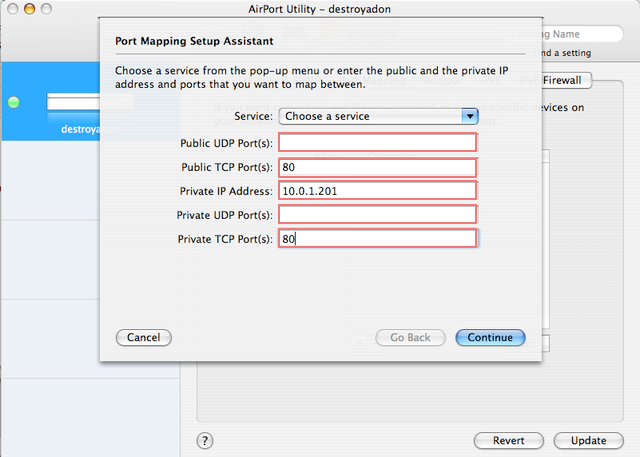
Default settings are seen as:
Public TCP Port(s): 80
Private TCP Port(s): 80
Private IP Address: Automatically fills in with the current IP address that is found in the System Prefs>Network Panel
If you have not already given your computer a Static IP, Go to System Prefs> Network pane and select your Airport.
- * Change the TCP/IP settings to Configure IPv4: Using DHCP with Manual Address
- * Now assign your computer above the limit of DHCP IP’s your station will dole out (< 10.0.1.200)
- * Those limits are set in the Airport Utility, Internet Pane, DHCP tab if you want to double check that you are outside those limits
6.) Defining Ports

All the Port options must be filled in, and must be the same port
I entered the port (51655) that I have set within my Azureus client as both the Incoming TCP/UDP Listen Ports.
There can be no more than one named service type (e.g. cannot be two Personal Web Sharing port services), and filling in ports where default values are not already given disables the continue button until all ports have been filled in.
Click Continue in order to name these settings.
7.) Naming Your Port:
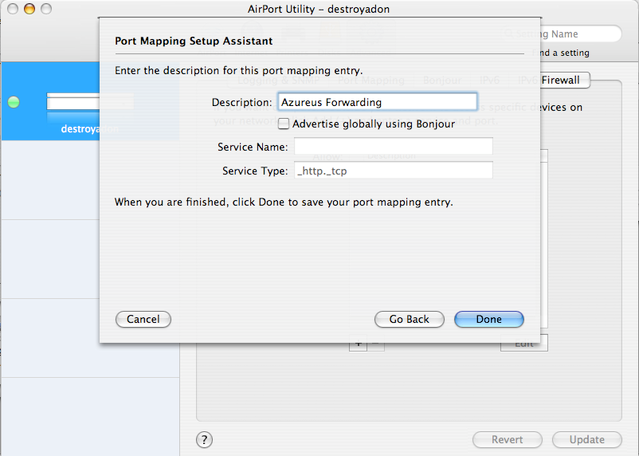
The above settings are then saved under whatever name you choose to save them as and can be edited in the same pane.
Update your AirPort Utility settings to finalize your changes and you should be port forwarding in no time.
Archived by FSFmirror
![]()
